WinSTIPS .
Tip Update and Core Update features in your WinSTIPS 2.1 program are no longer working.
WinSTIPS Tip Update 3.0 is a new program that replaces only the Tip Update and Core Update features in WinSTIPS 2.1.
You'll still use WinSTIPS 2.1 to view and enter tips. But you'll use the new program -- WinSTIPS Tip Update 3.0 -- only to perform a Tip Update or Core Update.
Below are the simple steps to use WinSTIPS Tip Update 3.0. Following that, you'll find the step-by-step instructions to download and install WinSTIPS Tip Update 3.0.
WinSTIPS Tip Update 3.0 .
Step 1 - Start Program
Note that a WinSTIPS Tip Update shortcut was installed on your Windows desktop. You can use this shortcut to start the WinSTIPS Tip Update 3.0 program.
Alternatively, click the Windows Start button and choose Programs > ServiceSoftware > WinSTIPS Tip Update > WinSTIPS Tip Update.
In any case, please ensure that WinSTIPS 2.1 is not running on your computer before using WinSTIPS Tip Update 3.0.
Step 2 - Registration
The first time that the WinSTIPS Tip Update 3.0 program runs, it attempts to find your WinSTIPS 2.1 Registration Number and Customer Number.
Your WinSTIPS 2.1 Registration Number and Customer Number must be entered here if they were not automatically found. There is not a new serial number or a new registration for WinSTIPS Tip Update 3.0; you need to enter your Your WinSTIPS 2.1 Registration Number and Customer Number, which you can see in WinSTIPS 2.1 by choosing Help and the Register from the main menu.
Step 3 - Tip Update / Core Update
On the Tip and Core Update tab, click either the Tip Update or the Core Update button to begin the update process.
An active WinSTIPS Subscription is required to use Tip Update or Core Update.
Tip Update: This process adds the most recently added records to your WinSTIPS database.
Core Update: This process deletes your existing WinSTIPS database and replaces it with an up-to-date WinSTIPS database.
WinSTIPS Tip Update 3.0 .
Step 1 - Begin Download
Click the Download Now button shown right here in this Step, or use our Download Page, to begin downloading the WinSTIPS Tip Update 3.0 installation file.
Step 2 - Save and Run
Example: Internet Explorer

Example: Internet Explorer

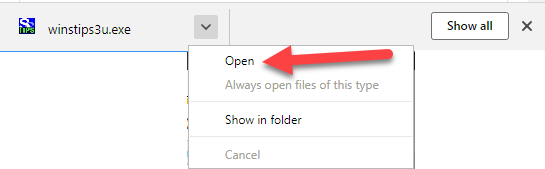
Example: Chrome
We advise to Save the WinSTIPS Tip Update 3.0 installation file to your computer, rather than to Run it directly.
For example, when a file begins to download, Internet Explorer offers options to either Run or Save the file. Click the Save button. Internet Explorer again displays a Run button after the file download is completed. Now it's okay to choose Run.
For example, Chrome displays an Open button after the file download is completed.
In any case, save the file to your hard drive and then Run it to begin the installation process.
Step 3 - Allow Changes
Depending on your Windows version, you may be prompted to allow the installation program to make changes to your computer.
Note that the installation is from a Verified Publisher.
If prompted, permit this activity.
Step 4 - Agreement
You will be prompted to accept the License Agreement.
Read this carefully and if you indicate agreement the installation will proceed.
Step 5 - Install Location
You will be prompted to choose where the program will be installed on your computer.
Usually you should accept the default and click the Next button.
Step 6 - Start Menu Location
You will be prompted to choose where the program shortcut will be installed on your computer.
Usually you should accept the default and click the Next button.
Step 7 - Ready to Install
Simply click the Install button to begin the program installation.
Step 8 - Trust
A message informs you that you may be prompted to approve the installation of certificates.
Click the OK button.
If you are subsequently prompted to approve the installation of certificates, then approve the install.
Step 9 - Trust Assigned
A message informs you that the trust settings were successfully applied.
Click the OK button.
Step 10 - Installation Completed
Installation is completed.
Click the Finish button.